Supplies Needed:
DAS Air Hardening Modeling Clay
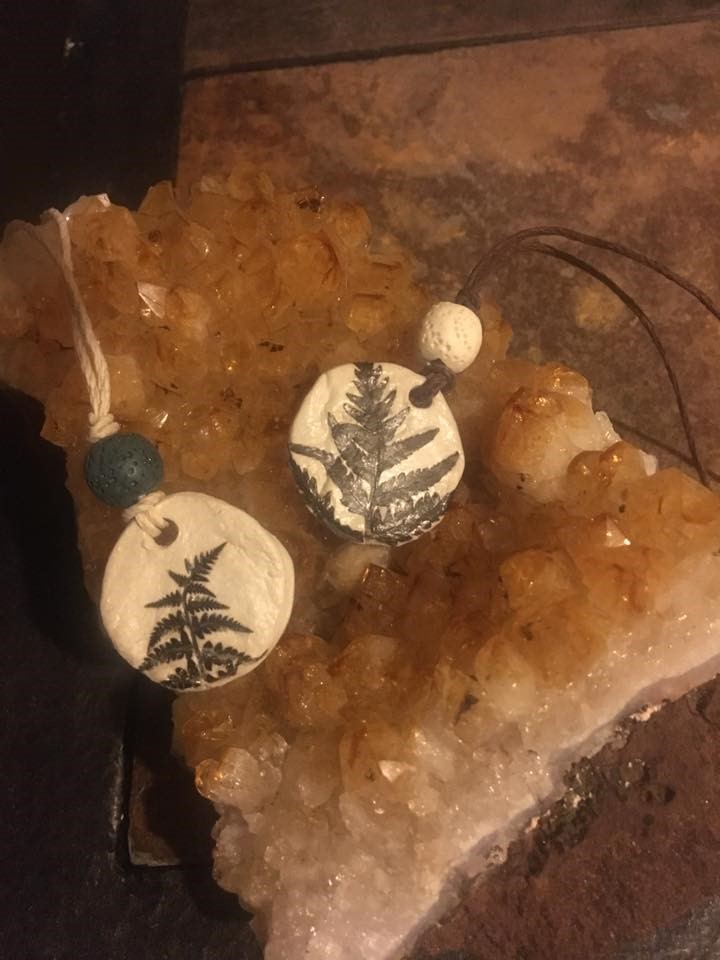
Hemp Cording (I used Darice 1925-86 Hemp Earthy Card Set)
Lava Beads
Rubber Stampers, or Natural Elements (Leaves, Flowers, Clover, Juniper)
Acrylic Paint
Modge Podge Glue, and Clear Acrylic Sealer
Straws, Water bottle or Milk Caps
A Rolling Pin
A Nail file and buffer
Paint Brushes
Water
Place mats or Wax Paper
1.) Start by gathering and arranging your materials to be ready for use.
2.) Lay down your wax paper & open your clay. (I mixed the clay with a bit of water so it was
malleable, then rolled it out with my rolling pin.)
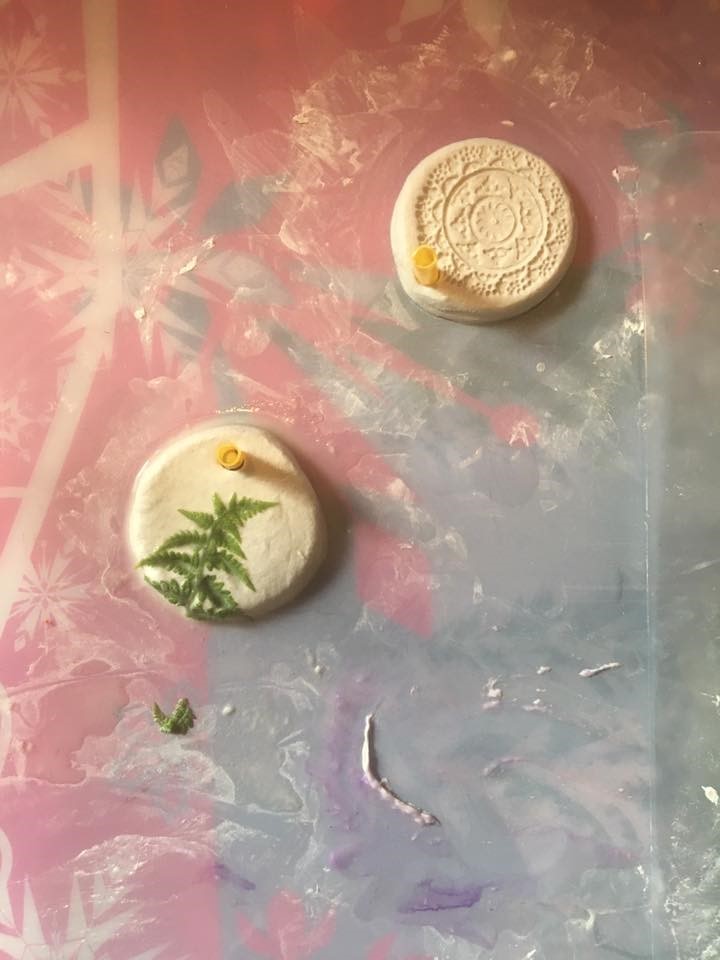
3.) Next, take your bottle caps and use them as a cookie cutter in the clay.
4.) When your circles are cut out, stamp them with your stamper, then insert a straw in the
top of the pendant where the cord will later be attached to the pendant. At this step you can
also gently press in natural elements to the pendant.
5.) Place pendants out of the way and let the pendants air dry 24-48 hours.
6.) Upon returning to your dry pendants, you can now remove the inserted straw and file any rough
edges with a nail file or buffer.
7.) If you applied natural elements you can now seal the natural element to the pendant with
Modge Podge Sealer, or remove the pressed element, apply a light layer of acrylic paint and seal
with Modge podge. (*If you chose to include natural elements or paint the front of the pendant you can
only apply the essential oil to the back of the pendant or lava bead.)
8.) Now it’s time to string the pendant on the hemp cord, and you can add a lava bead which I
knotted on for stability.
9.) Apply your favorite oil and enjoy!